Address:
Shenzhen Bao'an District Xinqiao Subdistrict Huangpu Community Huangpu East Ring Road No. 504 Shenzhen Yuan Industrial City Building C
Work Hours:
Monday to Friday: 9AM - 21PM
Weekend: 9AM - 21PM

Address:
Shenzhen Bao'an District Xinqiao Subdistrict Huangpu Community Huangpu East Ring Road No. 504 Shenzhen Yuan Industrial City Building C
Work Hours:
Monday to Friday: 9AM - 21PM
Weekend: 9AM - 21PM

Silicone molding is one of the most practical bridge-manufacturing processes for turning validated prototypes into small batches of production-like plastic parts. During new product introduction (NPI), 3D printing may not provide the required surface quality, color consistency, or material behavior, while injection molding can demand an unjustified tooling investment before the design and market demand are stable. Silicone molds combined with vacuum casting provide a middle path: fast tooling, realistic polyurethane materials, excellent cosmetic replication, and economical production for tens of parts rather than thousands.
For Senior Mechanical Engineers, Product Designers, NPI Managers, and Sourcing Professionals, the real value lies in choosing the process at the right stage. This guide covers material compliance, medical applications, surface quality, process selection, cost comparisons, DFM, procurement strategy, and scaling from prototypes to pre-production quantities.
How Silicone Molding and Vacuum Casting Work
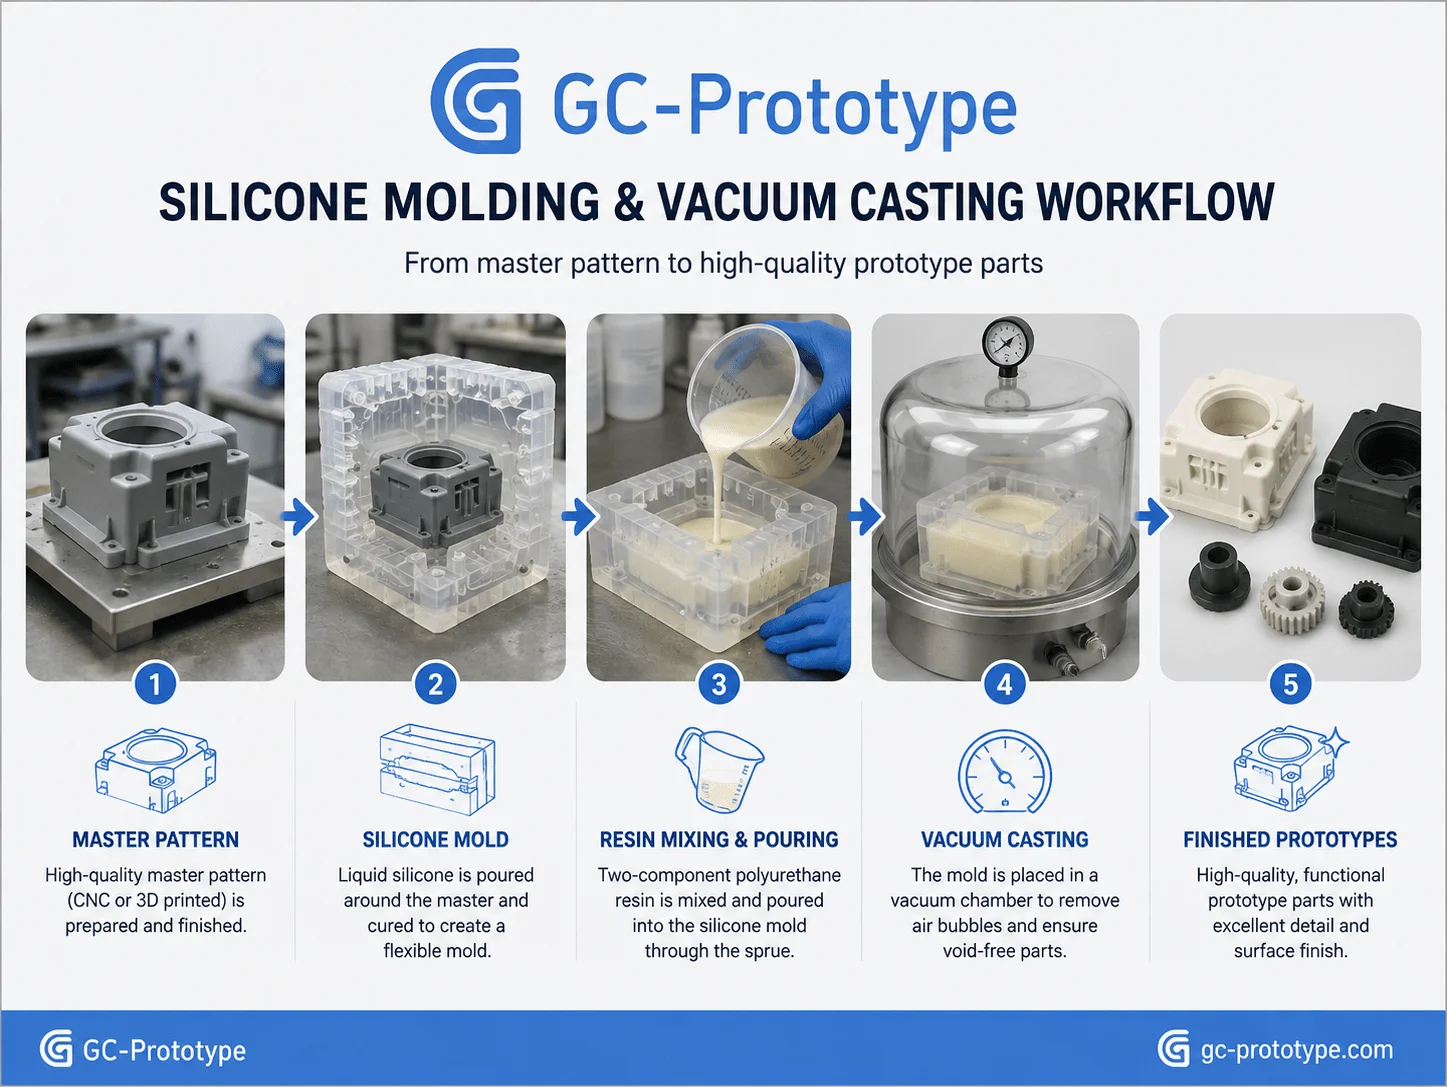
Silicone molding for prototypes normally begins with a high-quality master pattern manufactured by SLA, CNC machining, or another precision process. The master defines the geometry and most of the surface characteristics that will be transferred to subsequent castings.
The master is placed inside a mold box, and liquid silicone is poured around it. Once cured, the mold is carefully split along a planned parting line and the master is removed. This creates a flexible negative cavity that can reproduce undercuts and complex external features more easily than a rigid metal mold.
Polyurethane or another casting resin is then mixed, degassed, and poured into the silicone tool under vacuum. Removing trapped air helps the resin fill thin walls, ribs, cosmetic surfaces, and small details. After curing, the part is demolded, trimmed, inspected, and finished.
A typical workflow includes:
1.3D CAD and DFM review
2.Master-pattern manufacturing
3.Master sanding and surface finishing
4.Silicone mold preparation
5.Mold cutting and gating
6.Resin selection and color matching
7.Vacuum casting
8.Controlled curing
9.Trimming and secondary finishing
10.Dimensional and cosmetic inspection
Unlike injection molding, silicone tooling is relatively inexpensive and fast to manufacture. However, a silicone mold has a limited useful life because it gradually experiences tearing, chemical exposure, dimensional change, and surface degradation.
For many projects, one mold may produce approximately 15–25 acceptable parts, although actual output depends strongly on geometry, resin chemistry, wall thickness, undercuts, surface texture, and cosmetic expectations. Large undercuts or aggressive resins can shorten mold life, while simple components may achieve more castings.
| Manufacturing Process | Tooling Investment | Typical Quantity Fit | Surface Quality | Design Change Flexibility |
| 3D Printing | Very low | 1–10+ | Process-dependent | Excellent |
| Silicone Molding / Vacuum Casting | Low to moderate | 10–100 | Excellent | Good |
| CNC Machining | Very low | 1–100+ | Excellent | Excellent |
| Injection Molding | High | Hundreds to mass production | Excellent | Limited after tooling |
Industry Applications & Material Compliance
Silicone molding serves industries that need production-like plastic components before committing to injection molding. The process is particularly attractive for medical equipment, automotive development, robotics, industrial machinery, consumer electronics, and other B2B hardware programs.
Applications commonly include:
Medical-device housings
Diagnostic equipment covers
Automotive interior prototypes
Sensor enclosures
Robotic covers
Electronic housings
Control-panel components
Buttons and keypads
Transparent lenses
Soft-touch overmold simulations
Industrial equipment covers
Pre-production demonstration units
The process is also valuable for design verification because cast polyurethane can simulate many characteristics of injection-molded thermoplastics more realistically than some additive manufacturing materials.
Medical Innovation: Using biocompatible polyurethane resins for vacuum casting
Using biocompatible polyurethane resins for vacuum casting can support medical-device development when engineers need prototype housings, ergonomic components, clinical evaluation samples, or functional test parts with more production-like behavior than conventional visual prototypes.
Material selection requires careful qualification. A polyurethane resin should not be described as suitable for patient contact simply because it is marketed for medical prototyping. Medical R&D teams should review the documentation for the exact resin grade, intended contact type, exposure duration, sterilization method, chemical resistance, and applicable biological evaluation requirements.
For non-implant medical hardware, vacuum casting can be particularly useful for:
Diagnostic-device enclosures
Handheld instrument housings
Laboratory equipment components
User-interface buttons
Transparent fluid-observation covers
Ergonomic grips
Clinical evaluation prototypes
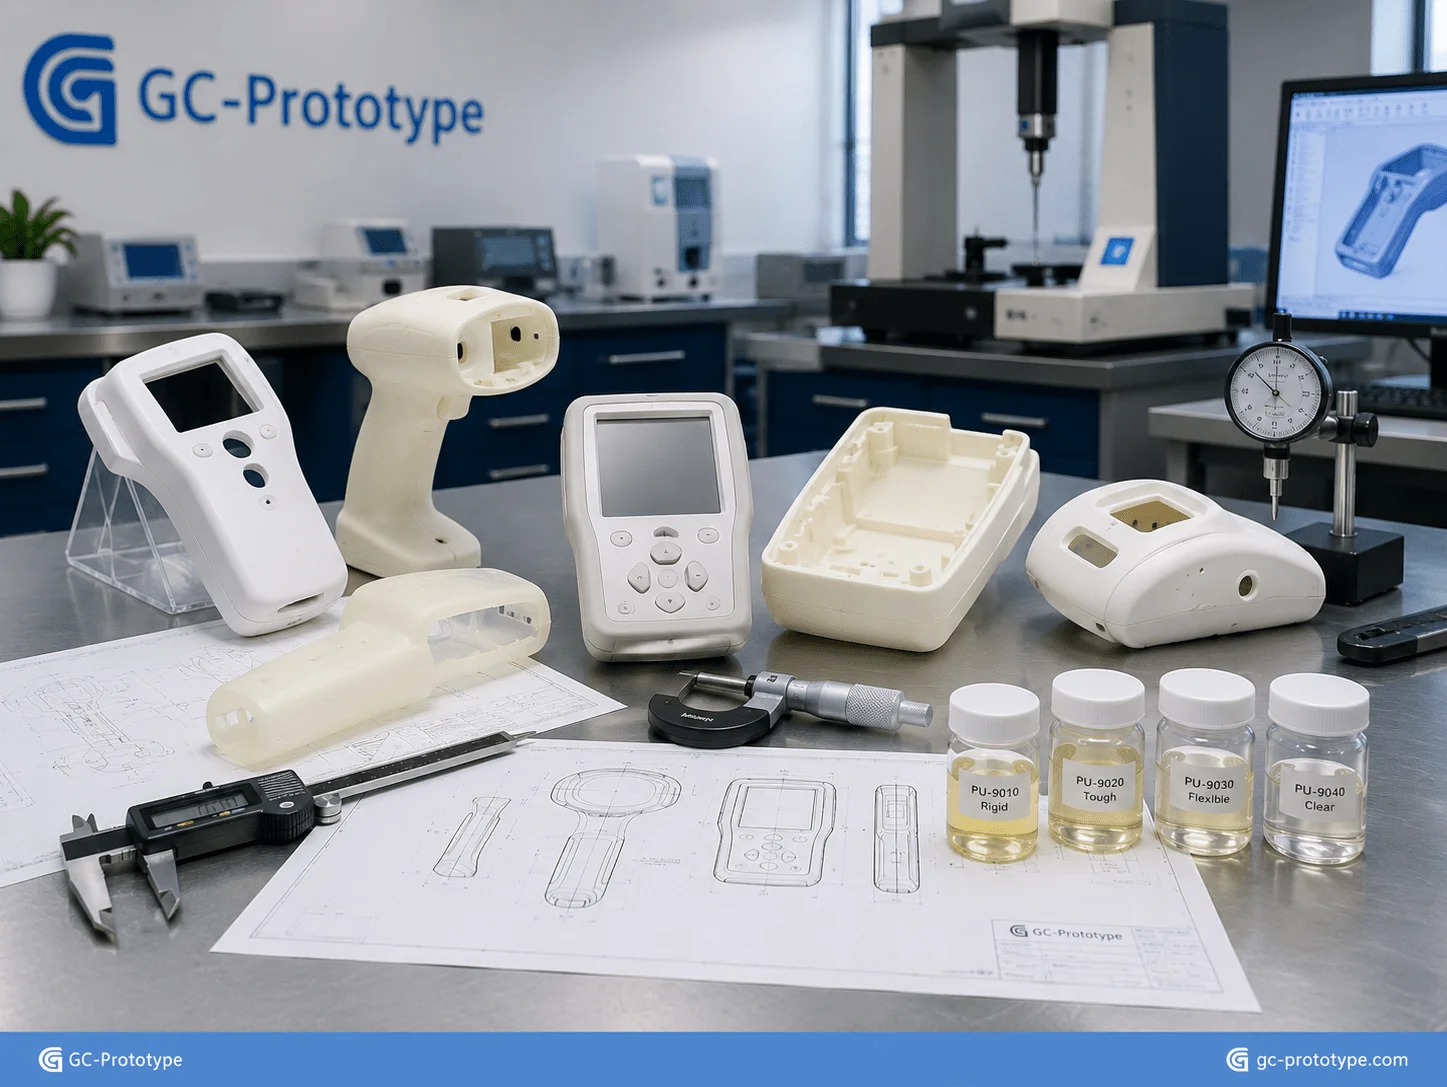
Material characteristics can be selected to simulate ABS, PP, PC, rubber, or other production plastics. This helps engineering teams evaluate assembly, handling, snap fits, enclosure stiffness, and user interaction before expensive hard tooling is released.
Medical prototypes may also require controlled pigmentation, clean surfaces, low visible porosity, and dimensional repeatability. Suppliers should therefore document the casting material used for each batch and keep resin mixing, cure time, and post-curing conditions controlled.
Sterilization deserves separate evaluation. A polyurethane casting resin may change color, soften, become brittle, or lose dimensional stability after exposure to heat, radiation, or chemical sterilants. The actual resin should be tested under the intended conditions rather than assuming that prototype performance will match the final injection-molded polymer.
For parts that will undergo biological or clinical evaluation, the device manufacturer should establish the appropriate regulatory and verification strategy. Vacuum casting can accelerate prototype development, but manufacturing process selection does not replace device-level compliance assessment.
Process Trade-Offs & Surface Quality
Cost Breakdown: silicone molding vs 3d printing cost
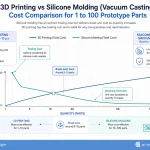
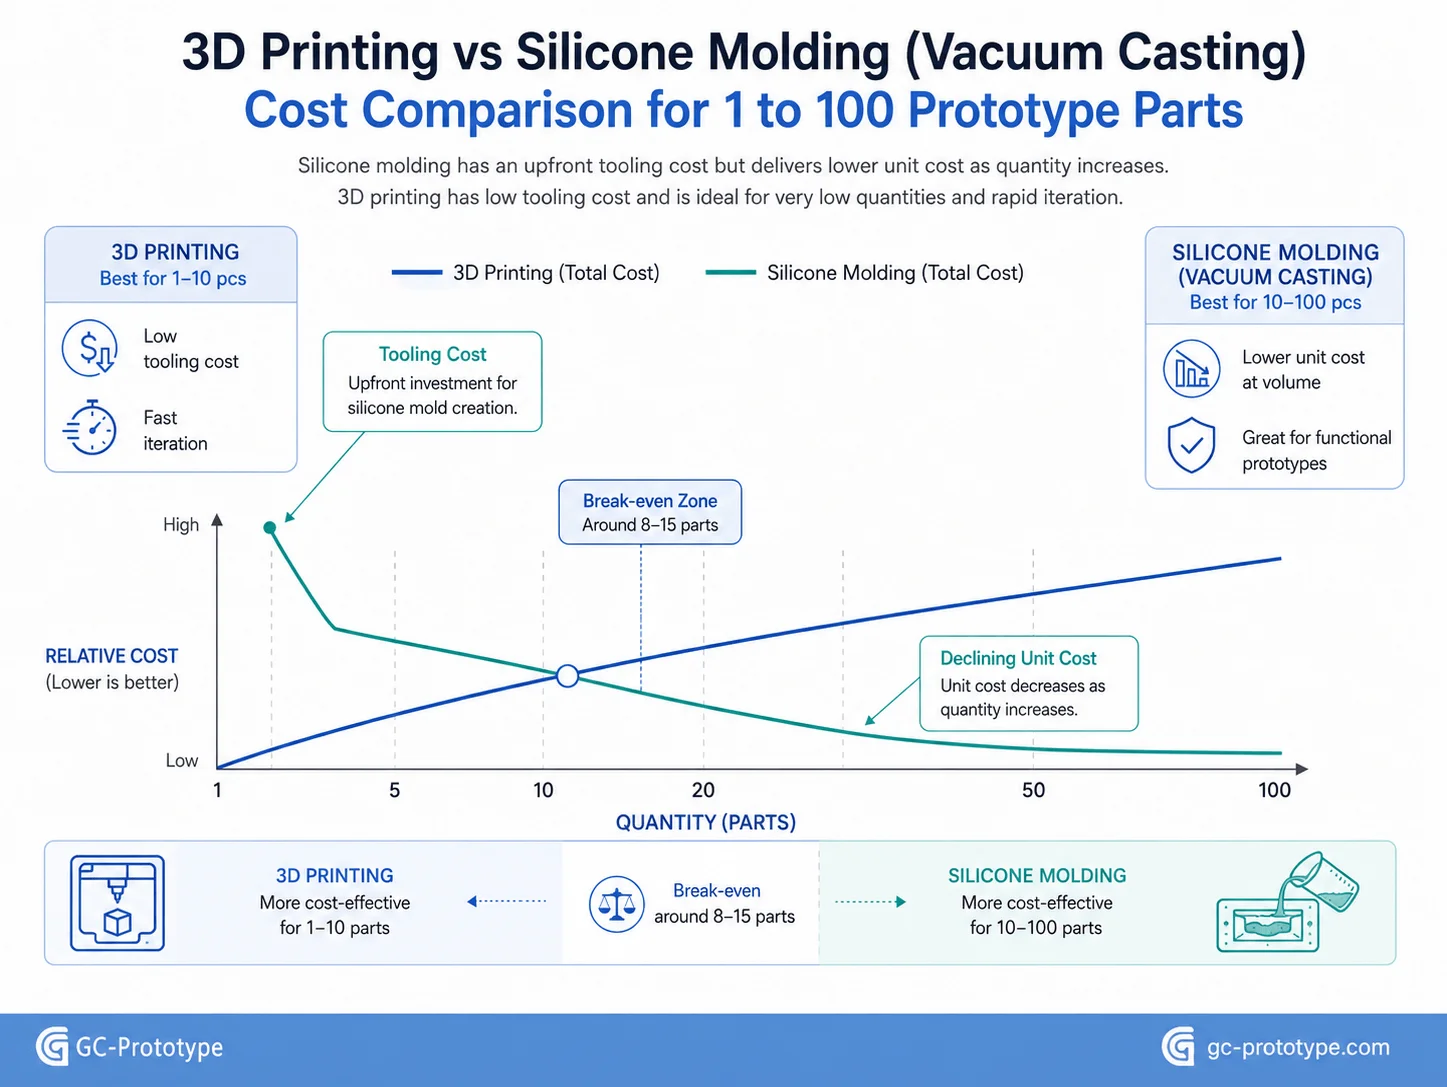
A realistic silicone molding vs 3d printing cost comparison starts with quantity. For one to five parts, direct 3D printing is usually the simpler economic choice because no master-tooling or mold-making stage is required. A CAD model can be sent directly to the printer and revised immediately after testing.
The economics begin to change when the project requires 10, 20, 50, or more identical parts.
With silicone molding, the cost of creating the master pattern and silicone tool is distributed across multiple castings. Once the mold exists, each additional polyurethane part requires primarily resin, casting labor, curing, trimming, and inspection.
This can produce a lower effective unit cost at low-volume quantities, particularly when every part needs consistent appearance and production-like material behavior.
| Cost Factor | 3D Printing | Silicone Molding |
|---|---|---|
| Initial tooling | None | Master + silicone mold |
| Best quantity | 1–5 or rapid revisions | Commonly 10–100 |
| Cost per identical part | Relatively constant | Falls as tooling is amortized |
| Design revisions | Very easy | New master/mold may be needed |
| Material simulation | Process-specific | Wide polyurethane simulation range |
| Surface consistency | Depends on print process | Excellent master replication |
| Color matching | Possible but variable | Strong batch consistency |
| Soft-touch parts | Technology-dependent | Very suitable |
| Cosmetic prototype batches | Moderate | Excellent |
Consider a startup developing a smart medical enclosure. During the first week, the engineering team may need only two physical samples to confirm dimensions. SLA printing makes sense because it avoids tooling and allows rapid modification.
Once the design passes fit testing, however, the company may need 30 units for usability studies, sales demonstrations, certification preparation, and internal validation. Printing 30 individual parts may involve significant machine time and repeated finishing. A silicone mold can replicate one professionally finished master across the entire batch.
Cost is not purely a unit-price calculation. Product teams should also account for:
Surface-finishing labor
Painting and color matching
Assembly preparation
Material performance
Revision risk
Tooling lead time
Inspection requirements
Deadline risk
Three-dimensional printing remains superior when every part is different or when the CAD design is likely to change after each test. Silicone molding becomes stronger once the geometry is stable enough to justify a reusable mold.
When 3D Printing Still Makes More Sense
Silicone molding should not automatically replace additive manufacturing at ten parts. Direct printing may remain more economical when the geometry is highly complex, the batch contains several design variants, internal passages cannot be molded, or the required production material can be printed directly.
SLS and MJF, for example, can efficiently nest numerous nylon parts within one build. For certain mechanical components, direct powder-bed printing may compete strongly with vacuum casting even at moderate quantities.
The right decision therefore depends on geometry, material, quantity, finish, revision frequency, and delivery requirements rather than one fixed numerical break-even point.
Aesthetic Excellence: Achieving Production-Grade vacuum casting surface finish
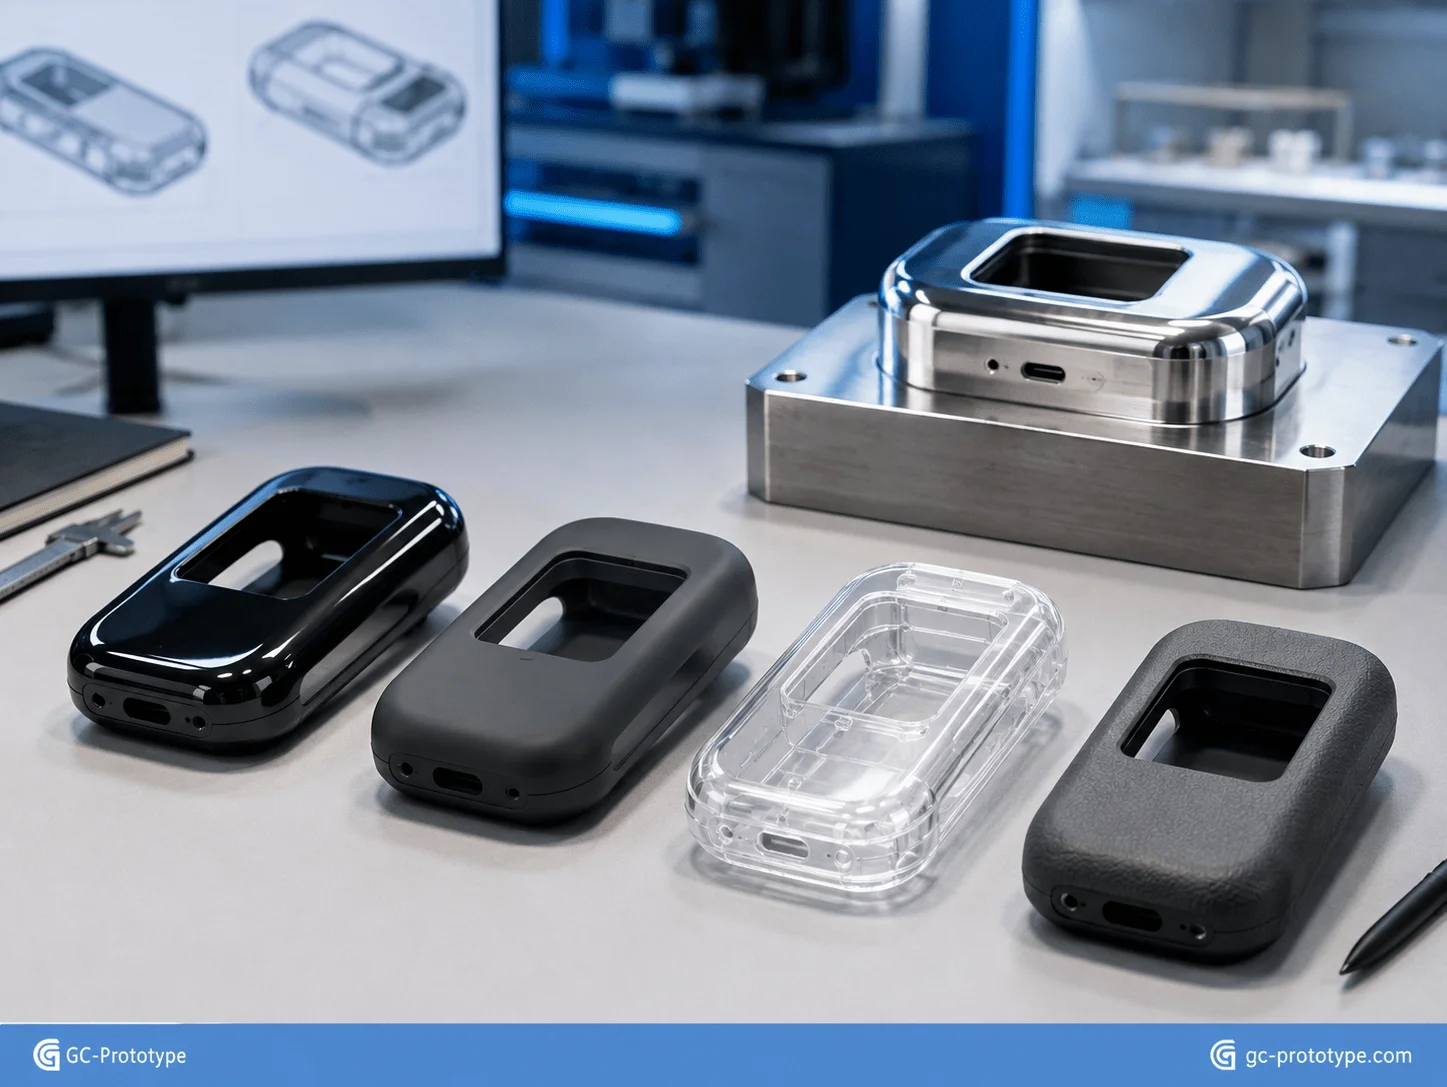
Achieving a production-quality vacuum casting surface finish starts with the master pattern. Silicone captures extremely fine surface details, which means every polishing mark, sanding defect, texture, seam, or imperfection on the master can be transferred into the mold and reproduced on subsequent parts.
This replication capability is one of the biggest advantages of vacuum casting.
The master can be prepared for:
High-gloss surfaces
Fine matte textures
Satin appearances
Light industrial textures
Painted Class-A surfaces
Transparent or translucent parts
Mold-texture simulation
For a consumer-electronics enclosure, the master may be polished, primed, and painted until it visually resembles a production injection-molded housing. The silicone tool then copies that surface repeatedly.
This is particularly useful for customer presentations, trade shows, investor demonstrations, photography, design reviews, and market testing where appearance matters as much as function.
Surface quality depends on more than the silicone mold. Resin mixing, vacuum degassing, pouring technique, cure control, mold cleanliness, release agent, and operator experience can all affect the final appearance.
Air bubbles are one of the most common defects. Vacuum processing removes trapped air before and during casting, but thin ribs, blind pockets, and poorly designed gates may still capture bubbles. Gate and vent design must therefore be considered during DFM.
Parting lines also require attention. Unlike a rigid injection mold, a silicone mold is manually opened and closed. The selected split line influences flash, trimming, cosmetic appearance, and dimensional repeatability. The parting line should be positioned away from important Class-A surfaces whenever geometry allows.
Transparent components demand even more process control. Clear cast parts may require a polished master, transparent resin, controlled curing, bubble prevention, and secondary polishing or clear coating.
For Industrial Designers, vacuum casting therefore offers an important advantage: a single approved master can establish a consistent visual standard for an entire evaluation batch.
Essential DFM Rules for Silicone Molding
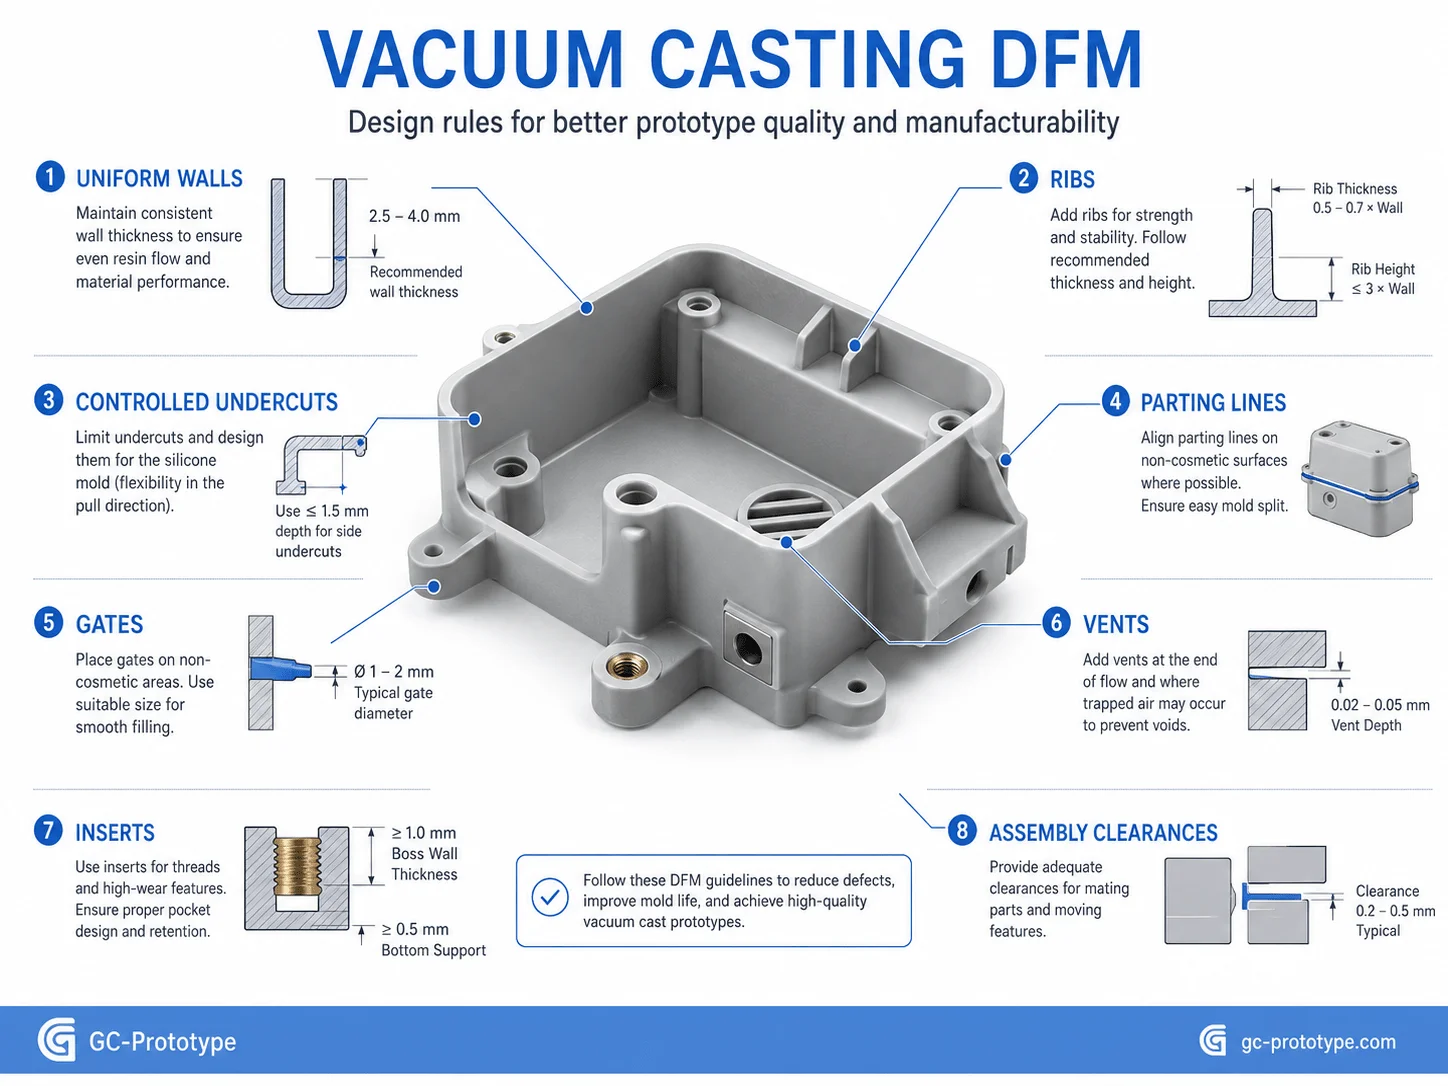
Silicone molds are flexible, but good DFM still matters. Designs optimized for casting produce fewer bubbles, easier demolding, longer mold life, and more consistent dimensions.
Maintain Reasonably Uniform Wall Thickness
Large variations between thin and thick sections can create uneven curing, shrinkage, and local distortion. Where possible, hollow thick regions and reinforce them with ribs instead of creating massive solid areas.
Uniform walls also reduce resin consumption, part weight, and curing time.
Use Practical Ribs and Bosses
Ribs improve stiffness without increasing the entire wall thickness. Screw bosses, mounting features, and structural ribs should transition smoothly into surrounding walls.
Very thin ribs can be difficult to fill, while extremely heavy bosses can cause shrinkage. DFM should balance mechanical requirements with resin flow and mold durability.
Manage Undercuts Carefully
Flexible silicone allows considerably more undercut freedom than rigid injection tooling. That does not mean unlimited undercuts are free.
Deep hooks, reverse features, and complex internal shapes increase demolding stress and may tear the silicone after repeated cycles. For a 50-part production run, excessive undercuts could require additional molds and increase total cost.
Plan Parting Lines, Gates, and Vents
The mold must be opened after every casting. Parting-line location therefore affects appearance and trimming effort.
Gates should allow resin to reach all features efficiently, while vents should release air from high points and enclosed areas. Cosmetic faces should remain free of large gates and unnecessary flash whenever possible.
Add Realistic Assembly Clearances
Vacuum casting can reproduce fine geometry, but it should not automatically receive CNC-level assembly tolerances. Resin shrinkage, mold flexibility, curing, and environmental conditions introduce dimensional variation.
Snap fits, PCB locations, battery compartments, fastener holes, and mating housings should include realistic clearances. Extremely critical features may require reaming, drilling, machining, or manual fitting after casting.
Consider Inserts During the Design Stage
Metal threaded inserts, bushings, magnets, and other hardware can sometimes be cast into polyurethane components. This can create strong functional prototypes without relying on weak printed threads.
Insert location, retention features, mold placement, and resin flow should be reviewed before mold manufacture.
| DFM Issue | Potential Problem | Recommended Approach |
|---|---|---|
| Very thick walls | Shrinkage and long curing | Core out heavy sections |
| Deep undercuts | Silicone tearing | Simplify or split geometry |
| No venting path | Air bubbles | Add suitable vents |
| Critical cosmetic parting line | Visible flash | Relocate split line |
| Very tight mating fit | Assembly problems | Add realistic clearance |
| Unsupported thin feature | Distortion | Reinforce or increase thickness |
Procurement Strategy & Scaling
Financial Edge: silicone molding for low volume plastic parts
Using silicone molding for low volume plastic parts gives Procurement Managers and Strategic Buyers an alternative to committing capital to injection tooling before demand is proven.
A typical NPI program may require:
10 engineering validation units
20 customer demonstration samples
30 market-test products
50 pilot-production assemblies
Purchasing an injection mold for this stage can create significant financial exposure. If the enclosure changes after field testing, the company may need expensive tool modifications or even a replacement mold.
Silicone tooling lowers that commitment.
The project can manufacture a controlled batch, collect feedback, modify the CAD model, and create another inexpensive mold if necessary. This converts a large upfront tooling decision into smaller incremental manufacturing investments.
For startups and established manufacturers alike, this reduces risk.
Understanding Low-Volume Cost Structure
A vacuum-casting quotation usually contains several major cost elements:
| Cost Driver | Why It Matters | Cost Optimization |
|---|---|---|
| Master pattern | Determines mold quality | Finalize geometry before finishing |
| Mold size | More silicone and labor | Reduce unnecessary envelope |
| Number of molds | Increases setup cost | Match molds to required quantity |
| Resin selection | Specialty grades cost more | Use performance-driven material |
| Color matching | Adds preparation | Standardize batch colors |
| Complex undercuts | Shortens mold life | Simplify where possible |
| Finishing | Manual labor | Replicate finish from master |
| Quantity | Amortizes tooling | Consolidate stable demand |
Suppose a program requires 60 identical plastic housings. If one silicone mold reliably produces 20 acceptable parts, approximately three molds may be required. The sourcing team should therefore evaluate mold cost, expected mold life, casting price, and finishing as one total package rather than assuming one tool will automatically produce the entire order.
A professional quotation should clearly state expected tool life and explain whether replacement molds are included.
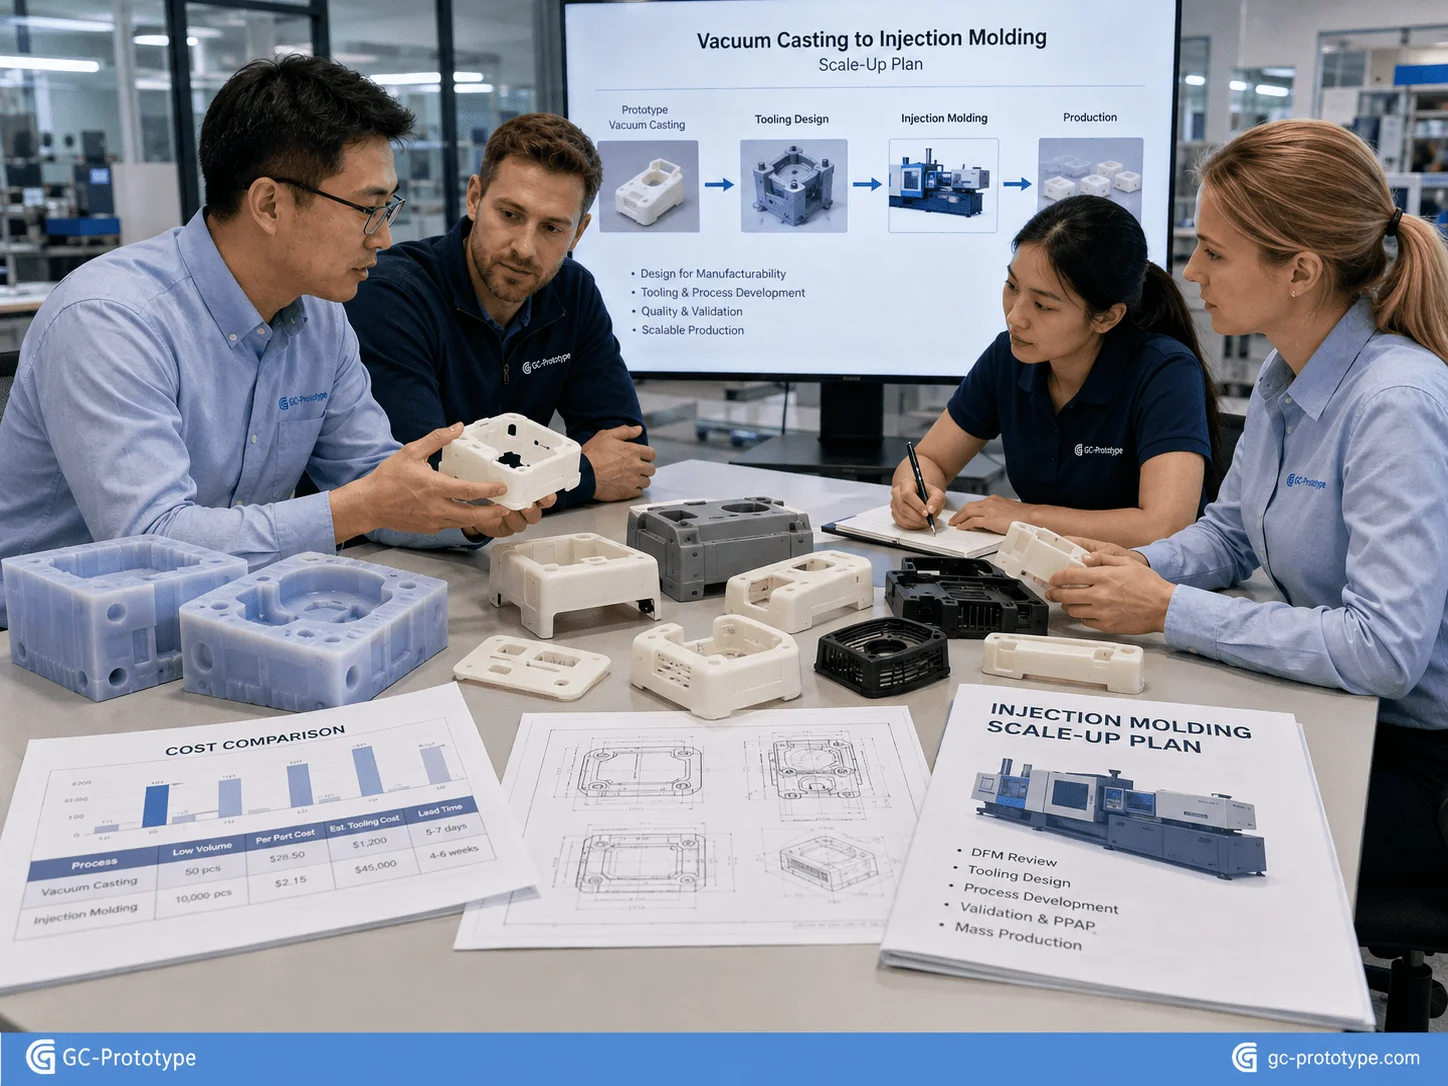
When to Move from Silicone Molding to Injection Molding
Silicone molding is a bridge process, not a universal mass-production solution.
As demand moves into several hundred or thousands of identical parts, injection molding normally becomes more economically attractive because a durable metal mold supports far more cycles and significantly lower recurring unit costs.
The transition should be based on:
Confirmed demand
Stable CAD geometry
Final production resin
Required tolerances
Annual volume
Product lifetime
Injection-tool investment
Forecast confidence
One practical strategy is:
3D Printing → Silicone Molding → Rapid Tooling → Production Injection Molding
This staged approach allows companies to invest progressively as technical and commercial uncertainty decreases.
Supply Chain Benefits Beyond Piece Price
For procurement teams, low-volume tooling provides additional advantages beyond direct manufacturing cost.
Short lead times can protect product-launch schedules. Producing parts near the engineering-validation stage also reduces excessive inventory. If a design is discontinued, the company avoids being left with thousands of obsolete molded components.
Vacuum casting is particularly useful when:
Demand is uncertain
Several colors are required
Product variants share similar geometry
Marketing samples are needed before tooling
Regulatory testing requires small batches
Bridge production must cover a tooling delay
Replacement parts have low annual demand
Application Scenarios for Silicone Molding
Medical Device Enclosures
A medical-device development team needs 25 handheld housings for ergonomic studies and functional evaluation. The enclosure requires a production-like matte finish, threaded inserts, and a polyurethane material with appropriate documentation.
Vacuum casting allows the company to test the design without purchasing an injection mold before verification is complete.
Consumer Electronics Demonstration Units
A smart-hardware manufacturer needs 40 premium enclosure samples for investor meetings, photography, and customer demonstrations.
The SLA master receives the approved texture and paint preparation. Silicone molds reproduce the surface consistently across the entire batch.
Automotive Interior Development
An automotive engineering team needs buttons, switch housings, bezels, and soft-touch components for prototype vehicle builds.
Vacuum casting provides several material hardness levels and colors without requiring separate production tooling for each early design.
Robotics and Automation Covers
A robotics company needs 60 protective covers for a pilot installation. Direct 3D printing provides adequate geometry but does not meet the customer’s cosmetic expectation.
Silicone molding provides repeatable production-like parts while the company validates market demand before committing to injection tooling.
Industrial Equipment Replacement Parts
An equipment manufacturer needs a small annual quantity of discontinued plastic covers. The original injection tool is no longer available.
A new master and silicone mold can provide replacement parts without rebuilding expensive production tooling.
Selecting a Silicone Molding and Vacuum Casting Supplier
A reliable supplier should support the complete process rather than simply pouring resin into molds.
Important capabilities include master-pattern production, SLA finishing, CNC machining, material guidance, silicone-tool design, vacuum casting, pigmentation, inserts, painting, texture replication, dimensional inspection, and packaging.
The RFQ package should include:
3D CAD files
2D drawings where necessary
Required quantity
Material or performance requirements
Color specification
Surface finish
Cosmetic zones
Critical dimensions
Inserts and hardware
Intended application
Testing requirements
Delivery schedule
The supplier should explain likely mold life, shrinkage expectations, parting-line location, gate strategy, cosmetic risks, and tolerance limitations before manufacturing begins.
For medical or other controlled applications, buyers should request documentation for the exact resin system rather than relying on generic claims. For appearance-critical consumer products, an approved color and texture sample can establish a clear acceptance standard.
A strong supplier should also explain when vacuum casting is not the correct process. If the geometry, tolerance, resin requirement, or production quantity clearly favors CNC machining, SLS, MJF, or injection molding, early process guidance can save substantial time and cost.
Frequently Asked Questions
What Is Silicone Molding Used For?
Silicone molding is used to manufacture low-volume plastic prototypes and pre-production parts from a reusable flexible mold. Common applications include housings, covers, buttons, automotive components, medical-device prototypes, and consumer-electronics samples.
How Many Parts Can One Silicone Mold Produce?
A mold commonly produces around 15–25 castings, but actual mold life depends on geometry, resin, undercuts, surface texture, part size, and quality expectations.
Is Vacuum Casting the Same as Silicone Molding?
The terms are often used together. Silicone molding refers to creating the flexible tool, while vacuum casting describes casting the resin under vacuum to reduce trapped air and improve replication.
Is Silicone Molding Better Than 3D Printing?
Neither process is universally better. Three-dimensional printing is highly efficient for one-off prototypes and frequent revisions. Silicone molding is often more attractive when 10–100 similar parts require consistent appearance and production-like material behavior.
Can Vacuum-Cast Parts Be Transparent?
Yes. Transparent polyurethane resins can produce clear or translucent prototypes, although achieving high optical clarity may require a polished master, careful processing, and additional surface finishing.
Can Different Colors Be Produced?
Yes. Pigments can be mixed into polyurethane resin, and parts can also be painted after casting. A physical color reference or standardized color specification should be provided for appearance-critical projects.
Can Metal Inserts Be Added?
Yes. Threaded inserts, bushings, magnets, and selected hardware can often be integrated during casting or installed afterward.
What Tolerances Can Vacuum Casting Achieve?
Tolerance capability depends on part size, geometry, master accuracy, resin shrinkage, mold design, and curing conditions. Critical precision features should be identified during DFM and may require secondary machining.
When Should a Project Move to Injection Molding?
The transition normally makes sense when the design is stable, demand is predictable, and recurring production volume is sufficient to amortize metal-tooling investment.
What Information Is Needed for a Quote?
Provide 3D CAD files, quantities, required material properties, color, finish, critical dimensions, inserts, application requirements, and delivery expectations.
Silicone molding and vacuum casting fill a critical manufacturing gap between one-off prototyping and production injection molding. They allow engineering teams to manufacture professional, repeatable plastic components without committing large amounts of capital to hard tooling before product design and market demand are fully validated.
For quantities around 10–100 pieces, the process can deliver an attractive combination of low tooling investment, production-like polyurethane materials, excellent cosmetic replication, color flexibility, insert integration, and short lead times. The greatest value comes when engineers use vacuum casting strategically: after early 3D-printed validation but before full-scale injection molding.
Successful projects depend on thoughtful DFM, realistic tolerance requirements, qualified materials, controlled master-pattern finishing, appropriate mold-life planning, and an experienced manufacturing partner.
Scaling from a single functional design to a pre-production run shouldn’t deplete your R&D budget. Whether you are a Senior Mechanical Engineer developing healthcare enclosures or a Sourcing Manager seeking low-volume plastic alternatives, GC Prototype delivers.